Posts

Heathkit IG-42 Checkout – Part 2
Image
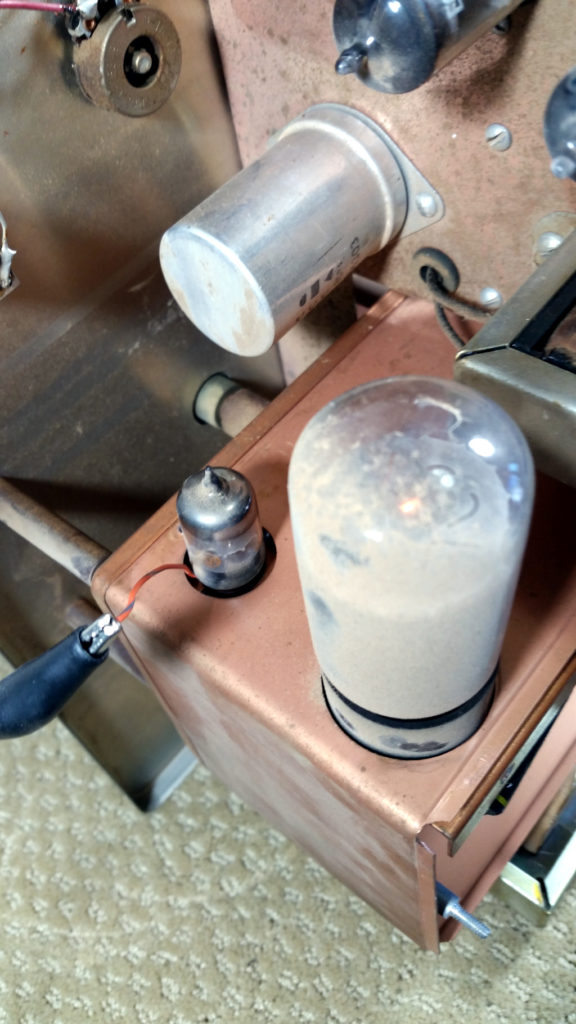
  Heathkit IG-42 Checkout – Part 2 Filed in Heathkit IG-42 on Mar.18, 2018 I put the IG-42 Signal Generator back on the bench to continue my initial inspection.  Today, I measured the voltages specified in the construction manual and measured the resistors (in circuit) to see if there were any obvious problems to address. Some of the tube pins were very difficult to access from the bottom side, so I stuck a wire in the top side on those pins and re-inserted the tube to get the readings.  This allowed me to continue without tearing the unit apart.     Cheater Wire for measuring tube voltages All measurements were made with the unit plugged into me variac transformer, with the voltage set to 115 vac, as originally specified for the IG-42.   115 vac input voltage The results are listed in the chart below… TUBE Pin1 Expected Pin1 Actual Pin2 Expected Pin2 Actual Pin3 Expected Pin3 Actual Pin4 Expected Pin4 Actual Pin5 Expec...
Kenpro KR-5400 Rotator Controller Repair

Image
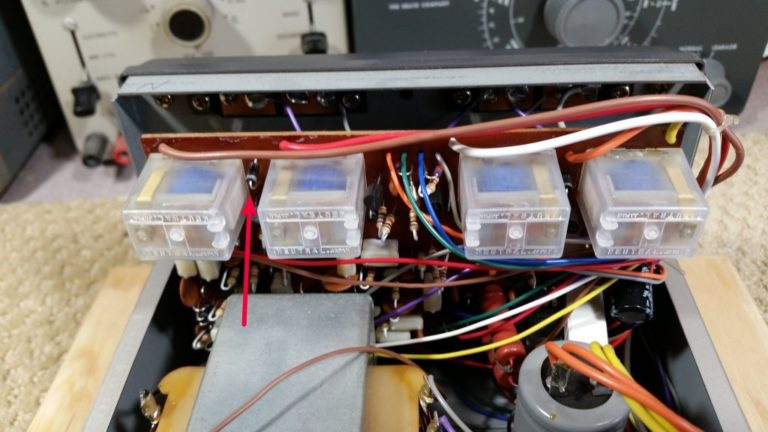
  Kenpro KR-5400 Rotator Controller Repair Filed in ANSR Tracker on Mar.14, 2018 At out last balloon flight, I discovered two problems with the rotator system.  The Elevation Meter was intermittent, and tapping on it would make the reading fall to zero, and tapping again would bring it back to the correct position.  This didn’t seem to be affecting the automatic control. I also found that the azimuth-right control was intermittent, and would not always move the rotor when pressed. This was definitely affecting the automatic control, as well as the manual control. I was able to recover each time by pressing the other controls for a short time, until the right rotation control worked again.   D18 Location I suspected poor connections in the control box for both of these problems.  Once I got home, I put the controller on the bench and removed the covers.  By probing on the cathode end of the diode across the relay coil, I was able to read 12 vo...

ANSR-115/116 High Altitude Balloon Flight

Image
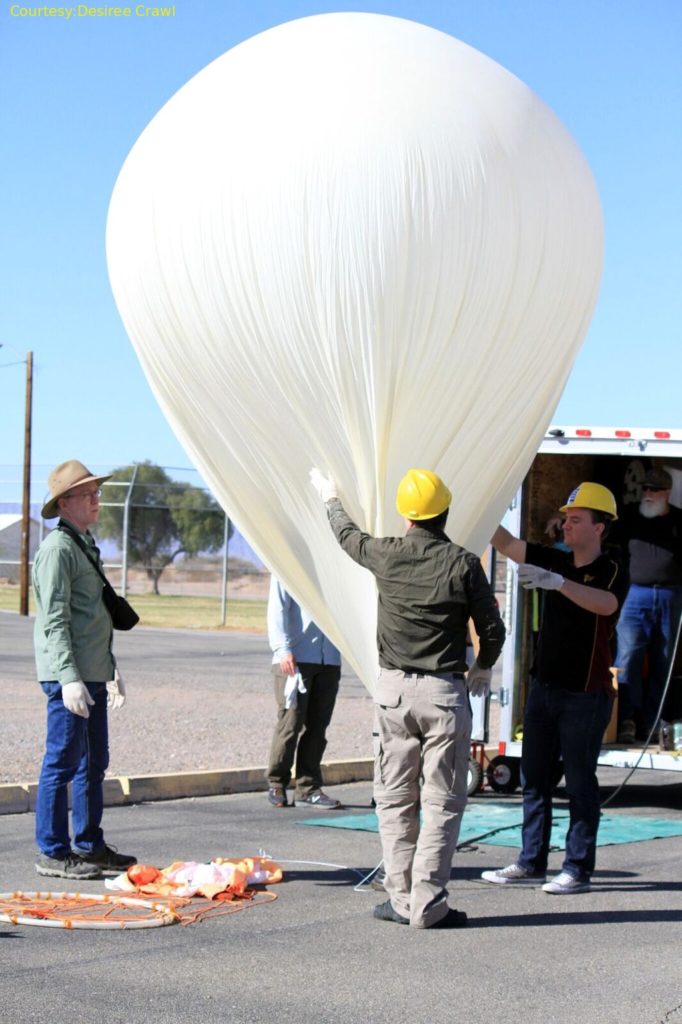
  ANSR-115/116 High Altitude Balloon Flight Filed in ANSR on Mar.14, 2018 On March 3rd, 2018, I helped out with the Arizona Near Space Research spring ASCEND flights.  Two high altitude weather balloons with payloads from several Arizona Colleges and Universities were launched from the parking lot of the grade school in Dateland, Arizona.   Inflating the balloon with helium   Student preparing payload for launch     Fly-Away   Intel-Man   Post-Launch My assignment this time was to preposition myself near the expected landing site, and get a head start on tracking down and finding the first balloon when it landed. I started out hanging out at the truck stop on Hassaympa Road and I-10 west of Buckeye, Az.  As the flight progressed, it became apparent that the balloon would land north of the Interstate, rather than South.  I repositioned myself to get closer to the revised estimate of the landing zone. I met up with Louis, W7...

Heathkit IG-42 Laboratory Generator – Initial Checkout

Image
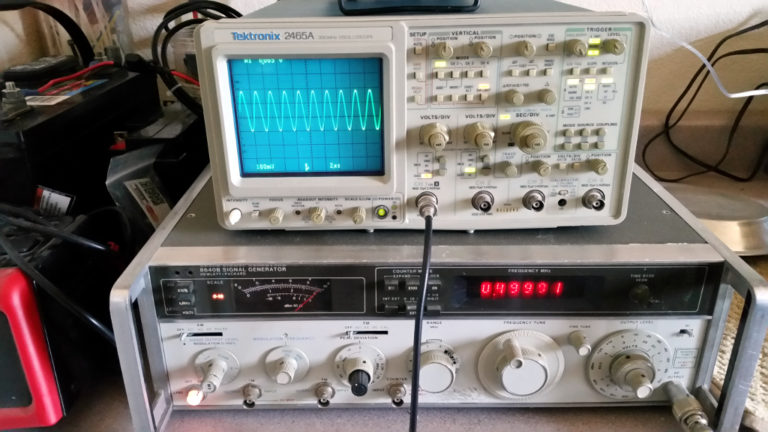
  Heathkit IG-42 Laboratory Generator – Initial Checkout Filed in Heathkit IG-42 on Feb.25, 2018 I hooked up the Heathkit IG-42 Signal Generator to the variac on the bench and brought the voltage up slowly, watching for signs of overheating or failed components.  There was a slight hum coming from the unit for the first couple of minutes, then it got better.  I suspect that the electrolytic capacitors were recovering after having not been in use for some time. The IG-42 is rated for 100,000 uv output, with a 50 ohm output impedance.  To check this against a known good source, I set up my HP 8640B signal generator for 0.1 volt output into the 50 ohm terminated input of my scope.  0.1 volt = 100,000 uv.   8640B Check Scope Calibration As the photo shows, I have about 0.28 vpp showing on the scope.  To get the rms value from the vpp value, you first divide by 2, then multiply by 0.707 0.28 / 2 = 0.14 0.14 x 0.707 = 0.09898  or approxi...

Heathkit IG-42 Laboratory Generator – First Look

Image
  Heathkit IG-42 Laboratory Generator – First Look Filed in Heathkit IG-42 on Feb.24, 2018 A friend and colleague of mine asked me to take a look at his Heathkit RF Signal Generator: IG-42.  The only information I got from him about it was that he had inherited it from a good friend, and had not had much luck using it. Here we will make our initial inspection of the unit, and try to get a feel for what work might be needed to restore it to a useful condition.   Front View as received The front panel is in pretty good shape, with just a few flaws: There is some writing or marks above the meter. There is a paint chip or scrape to the left of the frequency pointer. All of the controls are functioning, nut the knobs on some are loose.   Front Panel The cabinet has a pretty good sized dent on the top left side, and it is generally dirty and looks like it might have an oily residue on it.   Cabinet Top After pulling the cabinet off, we find that the chassi...

Heathkit C3 Condenser Checker – Wrapup

Image
  Heathkit C3 Condenser Checker – Wrapup Filed in C3 Capacitor Tester on Feb.24, 2018 Finally, I just wanted to demonstrate the operation of the C3 Condenser Checker.  I’m not much of a videographer, but here is my video demonstrating the device to check several good and bad capacitors for value and leakage. Enjoy!  

Heathkit C3 Condenser Checker - Knob Repair

Image
  Heathkit C3 Condenser Checker - Knob Repair Filed in C3 Capacitor Tester on Feb.24, 2018 Almost finished… A final repair on the knobs of the Heathkit C3 Condenser Checker, and it will be ready for operation.   Epoxy Two of the knobs had been overtightened in the past, and had cracked the knobs such that they could no longer be tightened enough to turn the controls.  Putting down a sheet of foil to control any mess on my bench, I used this two-part Epoxy from Harbor Freight to fill the holes around the outside of the knobs on the back. Hose clamps were tightened around the outside to force the knobs back together where they had separated at the cracks.  I left the center holes empty, so the shafts could still be inserted.   Knobs outside holes filled with epoxy After allowing the Epoxy to dry overnight, it became a very hard, clear filler.   Epoxy dried Then, I had no trouble tightening the knobs on the controls.  And they all still look o...