Posts

Showing posts from January, 2015

HW-16 Transmitter Work

Image
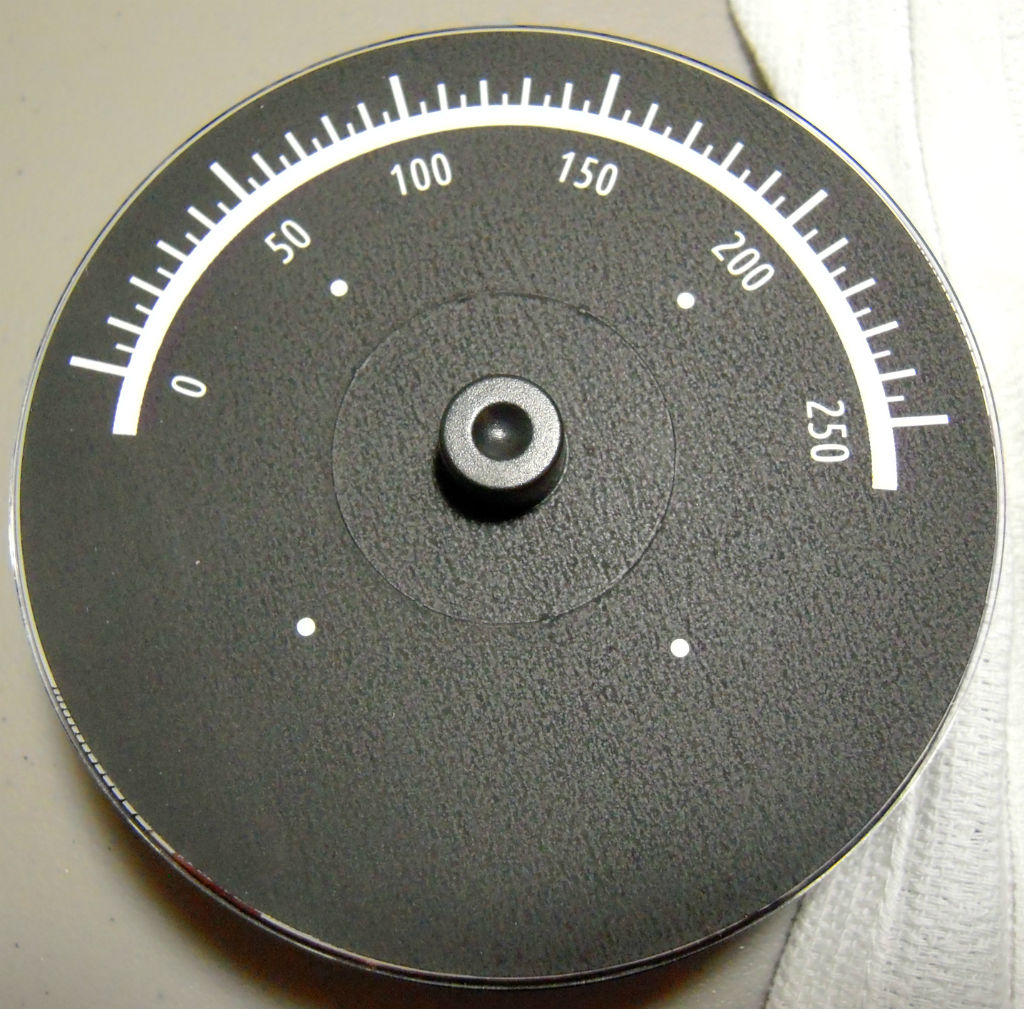
  HW-16 Transmitter Work Filed in Vintage Radio on Jan.24, 2015 Now that the receiver seemed to be working great, it was time to work on the transmitter some. The first thing I noticed is that the meter was indicating about a third scale with no power applied. I had read of another ham with this problem, who found that the meter had become magnetized. Convinced that I had the same problem, I spent about 15 minutes trying to degause the thing using an assortment of homebrew degausers. But none if it worked. Then, as I was moving the meter around in my hand, I noticed that there was a mechanical zero adjustment hidden underneath the meter movement.   Meter mechanical zero adjustment I didn’t think that it would have enough adjustment to fix the problem, but that is what it turned out to be. A simple adjustment, and the meter was back to zero.   Meter correctly zeroed I had ordered three crystals from Bry Carling, AF4K ( www.af4k.com ). They arrived promptly, and now I was re

HW-16 Dial Repair – Part 3

Image
  HW-16 Dial Repair – Part 3 Filed in Vintage Radio on Jan.11, 2015 OK, so now I had a translucent disk with a new dial label applied. Now I needed to mount the disk to the mounting plate for the HW-16. It turns out that this is harder than it sounds. I expected some trouble drilling the holes through the polycarbonate disks. But that turned out to be really easy.   Drilling mounting holes While drilling the holes was pretty easy, getting them in the right location was more difficult. I had put circles on the label to indicate where they were on the original dial, but there was just a bit of inaccuracy in a couple of the holes. So when I mounted the plate, it was off center.   Off Center mounting I installed the disk like that, but it wasn’t long before I discovered two things: First, by being off center, the disk was tight on one end of the scale and loose on the other, causing it to disengage from the drive mechanism periodically. Second, the drive mechanism was just to

HW-16 Dial Repair – Part 2

Image
  HW-16 Dial Repair – Part 2 Filed in Vintage Radio on Jan.11, 2015 Now that I had a decent image printed to a label, it was time to get a suitable disk to mount the label to. My first attempt looked really good, but did not allow any light to shine through from the back side, where the pilot lamp is located. So I needed a somewhat see-through disk. I used one of the clear plastic inserts that you get with the large packs of CDs that you buy for bulk media. But you only get one in each pack. It did work, but I also wanted to experiment with removing the aluminum media from the plastic disks to see how repeatable that was.   Sanded Disk I researched for a bit about using hydrochloric acid to remove the aluminum from the polycarbonate disks. It sounded promising, but when I went to look for the bottle of muriatic acid that I thought I had in the garage, it turns out that I had disposed of it sometime in the past. So, being too lazy to go to the Home Store to get more, I too

HW-16 Dial Repair

Image
  HW-16 Dial Repair Filed in Vintage Radio on Jan.11, 2015 Now that it’s time to fix or replace the old Dial in the HW-16, I started some research. It turns out that a CD or DVD disk is very close to the size of the original HW-16 dial. Like within an eighth of an inch. Since the dial drive mechanism is adjustable to a large degree, I thought I might be able to create a new dial from a CD or DVD in some way. Here is what I did…   New Label Applied The first step was to remove the old dial from the radio. This necessitated at least a partial removal of the front panel. As it turns out, it’s a good idea to remove the four mounting screws under the chassis that hold the VFO capacitor in place, as well. There just isn’t enough room to get the dial in and out without moving the VFO cap backwards just a smidgen.   Dial Removed from Radio After getting the dial out of the radio, I removed the mounting plate, and took the dial over to the flatbed scanner. There, I scanned an ima

HW-16 First Light (Signals!)

Image
  HW-16 First Light (Signals!) Filed in Vintage Radio on Jan.04, 2015 I was listening to Bill Meara (N2CQR) on one of his famous SolderSmoke podcasts when he explained first light. Astronomers have a word for the first time a new telescope is pointed to the sky and illuminated by starlight. They call it “First Light”. Bill likened this to the first time that a radio receiver is subjected to the airwaves, and signals are heard. I like that analogy.   First Light So at this point, the radio powers up, all the tube filaments light, as well as the pilot lamps. But it seems oddly deaf. I can barely hear a very slight hum from the speaker if I hold it up to my ear, but no background noise or hiss, even with the volume and RF gain controls at max. It almost seemed like it was muted, or in transmit mode, but there were no other indications of that, other than the deafening silence. So troubleshooting continued. I dug out my Norcal S-9 generator , which creates a 50 uv signal on

HW-16 First Power Up

Image
  HW-16 First Power Up Filed in Vintage Radio on Jan.04, 2015 Ok, so I ran through the short pre-check list that Heathkit provided in their manual, just a couple of resistance checks on the high voltage supplies. No problems found there. Time to plug it in and see what she does… I bring up new builds and old radios on a variac. That way I can walk the line voltage up slowly, in hopes of catching any significant flaws before they become catastrophic. (As in letting the smoke out).   Variac to bring power up slowly. So I start walking the line voltage up, 25 volts… 35 volts… 50 volts… 75 volts… Hmmm. I would be expecting to see tubes and lamps light up by now, but see nothing. I start probing around with my VOM, looking for B+ voltage. Nothing… Then I start looking for AC voltage. Yep, got it coming in. Got it to the On/Off switch. Nothing on the other side. I suspect bad switch contacts, and decide to jumper the on/off switch as a test. As I’m attempting to place the all

HW-16 Nearly Ready…

Image
  HW-16 Nearly Ready… Filed in Vintage Radio on Jan.04, 2015 So, at this point I have replaced all known or suspected faulty components, done some rewiring, and basically have the unit back together electrically. I didn’t save all of the replaced components, but here are some of the last few that I replaced…     Some replaced parts The shield around the driver and final stages has been reinstalled…     Transmit Shield installed Looking pretty clean.     Top View A closer look at the power resistors from Hayseed Hamfest:     Power Resistors Transmit tubes are installed…     Transmit Tubes And the receiver tubes, too…     Receiver Tubes We are ready to power this thing up, for it’s first electrical test…