Posts

Showing posts from July, 2015

A 24 Volt Sealed Lead Acid Battery Charger (Part 3)

Image
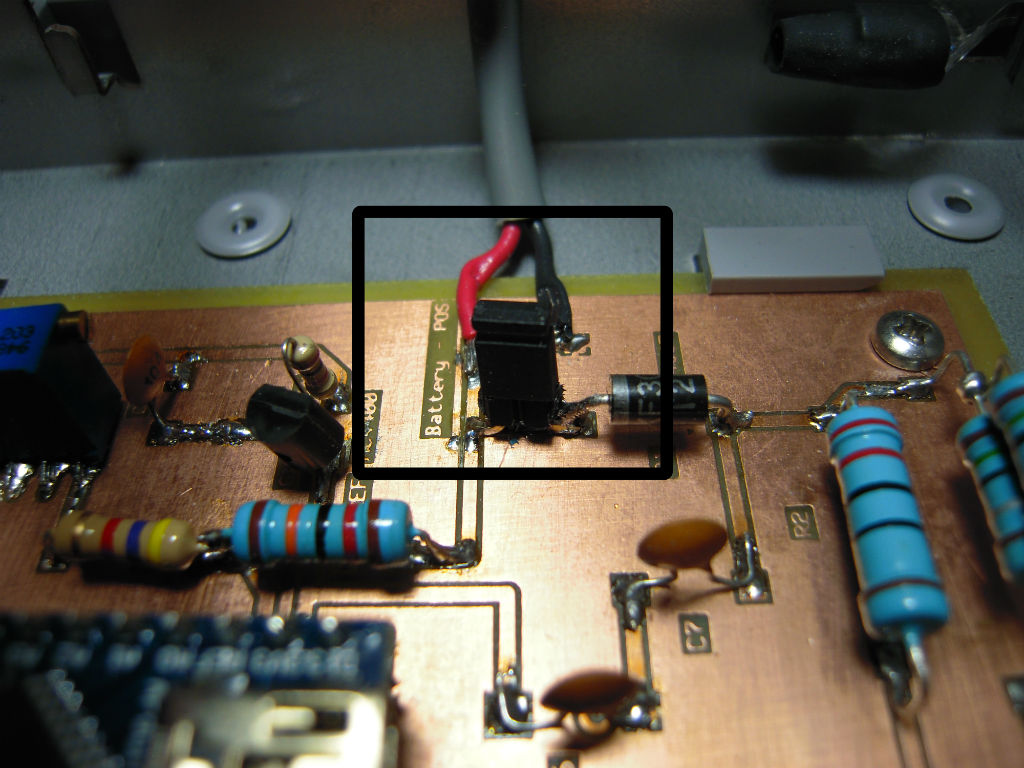
  A 24 Volt Sealed Lead Acid Battery Charger (Part 3) Filed in homebrew on Jul.27, 2015 In Part 1 of this project, we covered the general design of the battery charger. Part 2 described the physical construction of the charger. In Part 3, we will cover the calibration and operation of the charger, and present the Arduino Nano source code for the project. Once the board was populated, I isolated the output from the voltage sense resistors by removing the Jumper J3. Then I fed a voltage into the sensors which was adjustable, and substituted for a real battery. I set it up so that 30 volts resulted in 5 volts at the sense point, with 0 volts being zero at the sense point. This gave me a linear range to work with. Jumper J3 is shown below in the operating position. And here is J3 in the calibrating position…   In my first live testing with the mower, I found that the charger was not turning off when it should, which could result in overcharging the batteries and warping

A 24 Volt Sealed Lead Acid Battery Charger (Part 2)

Image
  A 24 Volt Sealed Lead Acid Battery Charger (Part 2) Filed in homebrew on Jul.27, 2015 In Part 1, we went over the design of the 24 volt charger. In this Part 2, we will describe the physical build. At this point, I developed a PC board to hold all of the components in a solid manner. Once the board was etched, I marked the holes to mount the Geetech 150 watt boost inverter, shown on the right, below. I followed this with population of the discrete electronic parts on the board. The LM-317, with the big heat sink, is at the top of the picture. The blocking diode that prevents the battery from backfeeding into the circuit is on the left top. The Arduino Nano is mounted on a socket near the middle of the board.  I made the socket from a couple of 24-pin sockets. One is mounted as a whole unit, and a second, with only 3 pins on each side, is mounted directly below the first, to add up to the 30 pins total needed to accommodate the Nano. The dropping resistors for the volt

A 24-Volt Sealed Lead Acid Battery Charger

Image
  A 24-Volt Sealed Lead Acid Battery Charger Filed in homebrew on Jul.27, 2015 Recently, the battery charger inside my battery powered lawn mower died (again). This time, I found that the printed circuit board was so rotted by moisture, that it was unrepairable. Knowing that the rest of the mower is still in great shape, and given that this OEM charging circuit had failed several times in the past, I set about designing a new external charger for the mower. The mower used a 24-volt Sealed Lead Acid battery for power (about 18 Amp Hours). I was unable to find a new battery locally that would fit, so I made a battery pack of two 12-volt 18-amp SLA batteries in series. I had done this previously, and it worked well for several years (until the charging circuit failed!) So this charger would require about 26 – 32 volts output, be current limited, and voltage regulated. 24 volt transformers are getting expensive, so I wanted to find a cheap alternative. I had several old