8640jr First 3 Stages
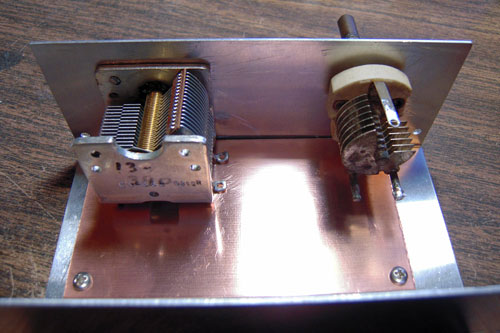
8640jr First 3 Stages Filed in homebrew on Apr.22, 2012 I finally got some time to work on the 8640jr Signal Generator Project. I decided to put the VFO and the first two amplifiers inside an aluminum box. Why? I’m hoping it will help the frequency circuits temperature-stabilize, and provide a way to isolate the sensitive frequency determining components from the effects of a hand getting near them and shifting the frequency while operating it. I started by mounting the blank pc board in the enclosure. This gave me a guide as to the height and position of the main and bandspread tuning caps: The main tuning cap was one I picked up from Antique Radio Supply, in Tempe, AZ. Their website lets you order for the will-call window, if you are local. The bandspread cap was a hamfest special. Once the caps were mounted, I now had a guide as to where to place the pads for the various components. I knew I had to avoid the areas directly under the tuning caps...


