Posts

Showing posts from November, 2018

Heathkit TC-1 Tube Tester Restoration Part 5

Image
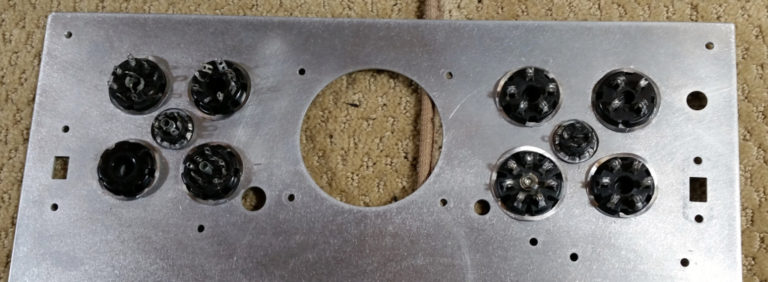
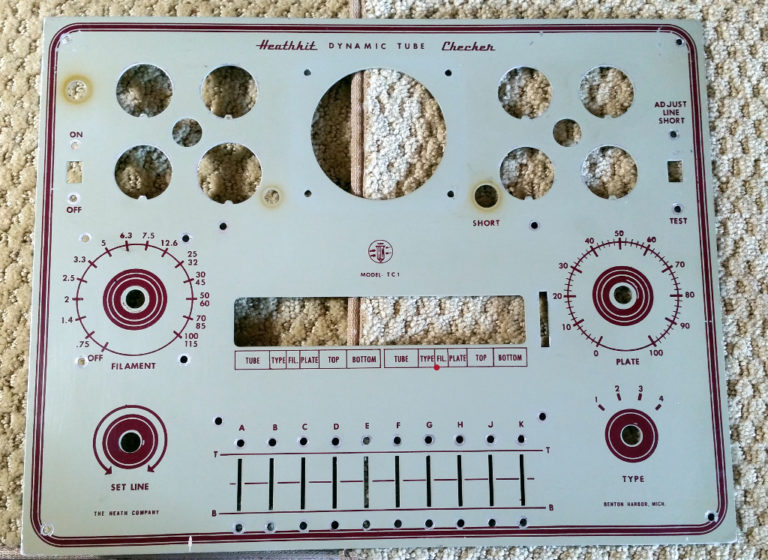
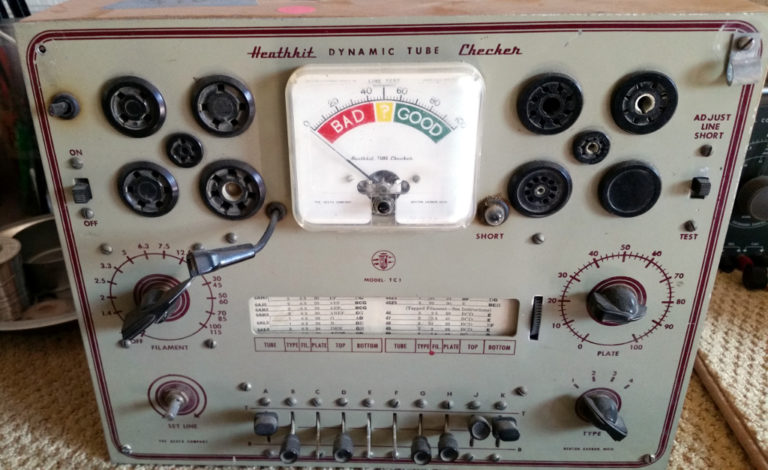
  Heathkit TC-1 Tube Tester Restoration Part 5 Filed in Heathkit TC-1 on Nov.19, 2018 Part 5 – Reassembly The TC-1 Tube Tester is now fully disassembled.  Now we begin to clean up individual parts and reassemble. I started with cleaning up the tube sockets, by removing the old solder and boiling them for 15 minutes in a 50 -50 mixture of white vinegar and water.  That removed the old solder flux that was caked on.  The sockets were then reinstalled onto the panel, using the wavy rings that I had cleaned up to hold them in place. I was careful to look at pictures I had taken before disassembly, to insure I put them back in with the same orientation.  The manual was not very clear on the proper orientation.   Tube Sockets remounted Next, I cleaned up the ON/OFF switch by using Deoxit on the contacts.   Rusty, dirty ON/OFF switch Then I used a wire brush to remove most of the rust/corrosion from the exterior.   Clean ON/OFF switch Then I mounted it to the panel using the clean

Heathkit TC-1 Tube Tester Restoration Part 4

Image
  Heathkit TC-1 Tube Tester Restoration Part 4 Filed in Heathkit TC-1 on Nov.15, 2018 Part 4 – Cleanup I began cleanup of the TC-1 Tube Tester with corrosion removal on the front panel.  The painted side was in pretty good condition, with just a little discoloration where the rubber grommets were.  I couldn’t get the discoloration out, but new grommets should cover it up pretty well.   Front Panel The back of the panel had a good amount of corrosion on it, as well as some tape fragments that were stuck pretty good. I started with a scrubbing with dish soap and water, then I sanded down the back of the panel with my orbital sander.  I followed that all with a light wet sanding.   Back of panel – before cleanup   Back of panel – Post cleanup   Next, I moved on to cleaning up the clamps that hold the tube sockets in place.  I made a pass at these on my bench grinder with a wire wheel.  They cleaned up pretty good, removing all of the corrosion.   Socket Clamps – Before Cleanup

Heathkit TC-1 Tube Tester Restoration Part 3

Image
  Heathkit TC-1 Tube Tester Restoration Part 3 Filed in Heathkit TC-1 on Nov.15, 2018 Part 3 – Teardown The next part of the restoration is the teardown phase.  This will include corrosion removal and general dirt/flux cleanup of the unit.  I started by removing the 10 lever switches.  These were held in place with 3 bus wires and a few wires going off to other circuitry.   Lever Switches Removed As I proceeded into the teardown,I noticed that in order to clean up the major corrosion, I would need to remove the various switches, potentiometers and tube sockets.  Unfortunately, the tube sockets come out the front of the unit, so all of the wires must be unsoldered from them.  This turned out to be ok though, as most of the solder joints were in poor condition anyway.  I don’t know if I’ll be able to save any of the cloth covered wire looms, but I will try to keep them intact.   Tube Socket Conditions At this point, since I was removing all of the wiring, I took photos of e

Heathkit TC-1 Tube Tester Restoration Part 2

Image
  Heathkit TC-1 Tube Tester Restoration Part 2 Filed in Heathkit TC-1 on Nov.09, 2018 Part 2 – Testing the Transformer In Part 2 of this series, I’ll check out the transformer in the tube tester.  This is the heart of the unit, and if it is not good, then the project will be scrapped.   Test Locations for Filament Readings Filament Selection Actual Voltage 0.75 0.77 1.40 1.54 2.00 2.11 2.50 2.69 3.30 3.46 5.00 5.18 6.30 6.74 7.50 7.88 12.60 12.87 25.00 26.58 30.00 33.66 50 - 60 52.60 70 - 80 73.70 100 - 115 115.20 As you can see, the filament windings all appear to be intact.  Most are reading a little high, as would be expected with no load.   12.6 volt filament reading – no load Next is to check the high voltage windings – 30v, 100v and 250v. For all three of these, the common lead is the right hand lead of the Plate Voltage potentiometer. The one with the red lead soldered on it. For the 30 volt winding,

Heathkit TC-1 Tube Tester Restoration Part 1

Image
  Heathkit TC-1 Tube Tester Restoration Part 1 Filed in Heathkit TC-1 on Nov.09, 2018 Part 1 – Initial Inspection I picked up this Heathkit TC-1 tube tester at the Williams, AZ Hamfest several years ago.  It had the power cord cut off at the entry, and a $10 price tag.  I took a chance that the transformer might be good, and picked it up.  Now to find out if it was worth the risk…   Heathkit TC-1 as found The front panel was in pretty good shape, with a few knobs missing.  All controls moved smoothly through their positions.  The power cord is missing, and there is a little bit of corrosion around the mounting hardware for the controls and the lamp test socket.   Heathkit TC-1 bottom view The bottom of the panel shows some light, powdery corrosion.  Mounting hardware for the tube sockets shows heavier corrosion.  There are bunches of bad solder joints to be cleaned up.   Set Line Rheostat The “Line Set” Rheostat looks to be in good shape.  It will probably just need the con