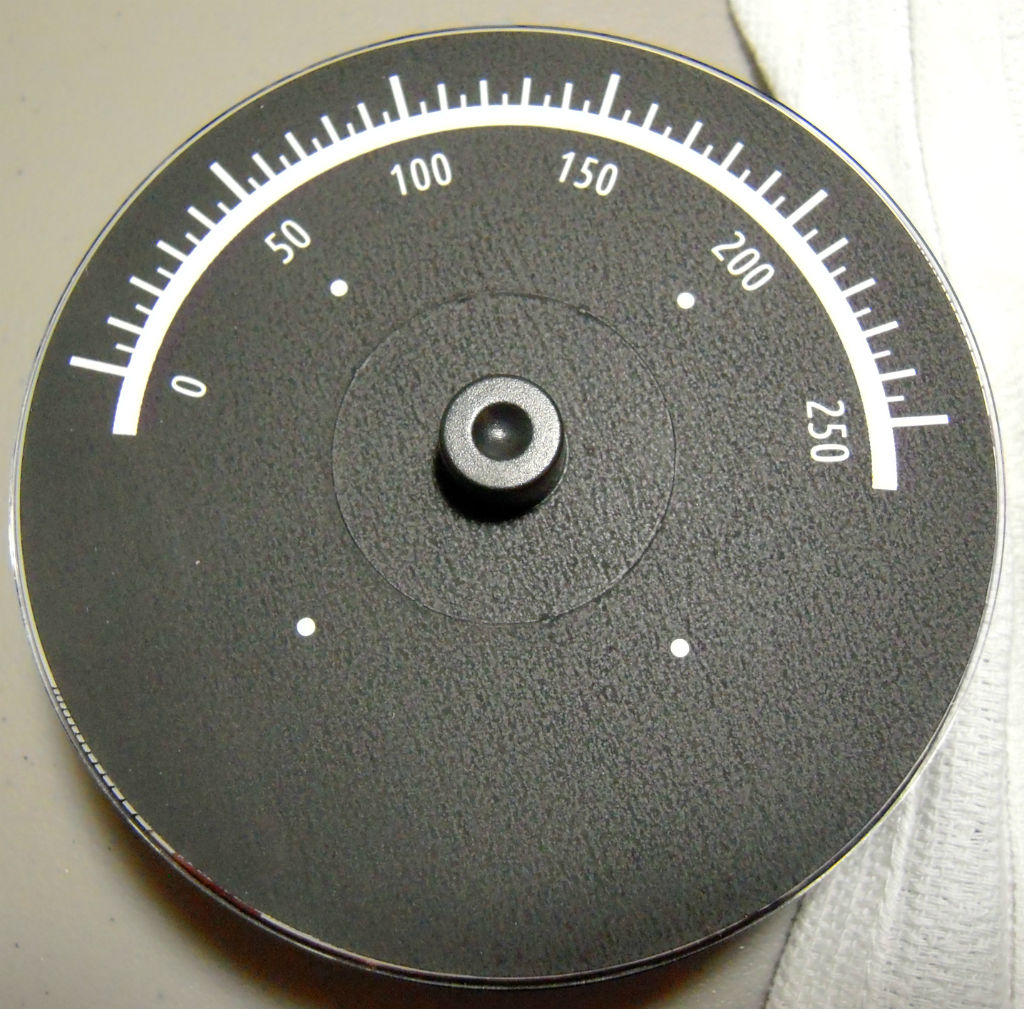
HW-16 Dial Repair
HW-16 Dial Repair
Now that it’s time to fix or replace the old Dial in the HW-16, I started some research. It turns out that a CD or DVD disk is very close to the size of the original HW-16 dial. Like within an eighth of an inch. Since the dial drive mechanism is adjustable to a large degree, I thought I might be able to create a new dial from a CD or DVD in some way. Here is what I did…
The first step was to remove the old dial from the radio. This necessitated at least a partial removal of the front panel. As it turns out, it’s a good idea to remove the four mounting screws under the chassis that hold the VFO capacitor in place, as well. There just isn’t enough room to get the dial in and out without moving the VFO cap backwards just a smidgen.
After getting the dial out of the radio, I removed the mounting plate, and took the dial over to the flatbed scanner. There, I scanned an image of the bad dial into a variety of formats. It turns out that the best format for my purposes was jpeg. I used 600dpi, as I wanted to make certain I had enough detail to work with as I attempted to duplicate the dial.
Once the dial was scanned in, I opened the image in a Drawing Program. Since I am working in Linux, I used LibreOffice Draw.
This program is a lot like Adobe Illustrator. I can add layers to keep items separate from each other while I work on them, but still allow me to over overlay one image with another to kind of “trace” the image from the bad disk. This is done by setting the transparency of the various objects.
The result is that I can have to original image, overlaid by whatever objects (colored circles, text, lines, boxes, etc) that I add on the other layer to duplicate and clean up the original image. On this photo, I have the transparency set to 75% for all except for the lines, numbers and the original scan.
Once the numbers, lines and everything was lined up, I set the original scan layer to be non-printable, and set the other objects to be non-transparent. This allowed me to print the new image out to whatever format I wanted. I had originally thought to try using the LightScribe function on one of my computers with a LightScribe DVD player to directly print the image to a blank CD. But it turns out that HP killed that technology a few years ago, so I can no longer find LightScribe CDs locally. I could have ordered them, but didn’t want to wait.
So my second choice was to laser print to an adhesive CD label from Avery. It took a few trials and errors to get the positioning right on the paper for where the actual label was, but it was a matter of moving the entire image left, right, up or down until it printed in the correct location.
Continued on Part 2…


Comments
Post a Comment