Heathkit TC-1 Tube Tester Restoration Part 1
Heathkit TC-1 Tube Tester Restoration Part 1
Part 1 – Initial Inspection
I picked up this Heathkit TC-1 tube tester at the Williams, AZ Hamfest several years ago. It had the power cord cut off at the entry, and a $10 price tag. I took a chance that the transformer might be good, and picked it up. Now to find out if it was worth the risk…

The front panel was in pretty good shape, with a few knobs missing. All controls moved smoothly through their positions. The power cord is missing, and there is a little bit of corrosion around the mounting hardware for the controls and the lamp test socket.

The bottom of the panel shows some light, powdery corrosion. Mounting hardware for the tube sockets shows heavier corrosion. There are bunches of bad solder joints to be cleaned up.
The “Line Set” Rheostat looks to be in good shape. It will probably just need the connections touched up. The taped wire looks suspicious. I’ll have to look into that

Some corrosion on the bus wires for the selection switch bank will need to be cleaned up. All of the switches have a dark oxidation on them to clean up.

That looks like a broken/burned resistor on the “Type” selector switch, along with one of the old style resistors on the right that typically are out of spec. There is also some solder work to be done here.

The large resistor to the right of the “Plate” potentiometer is just floating on one leg. It would be nice to make that more secure.

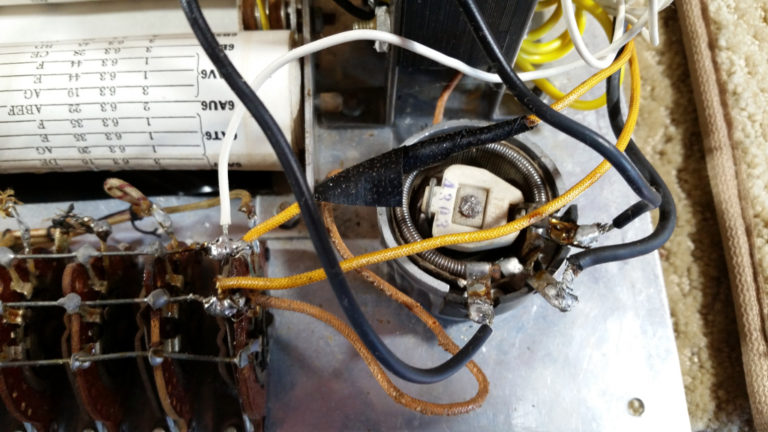
The top left of the chassis has lots of corrosion on the tube socket mounting hardware, as well as plenty of bad solder joints to fix.

The meter appears to be in good condition, at this point. We will probably need to change the capacitor on the back of the meter.

The right hand tube sockets are more of the same. Corrosion on the mounting hardware and poor solder joints.

The paper data roll is in good condition. I’m afraid to do much with it at this point, for fear of tearing it. We will see how it holds up.
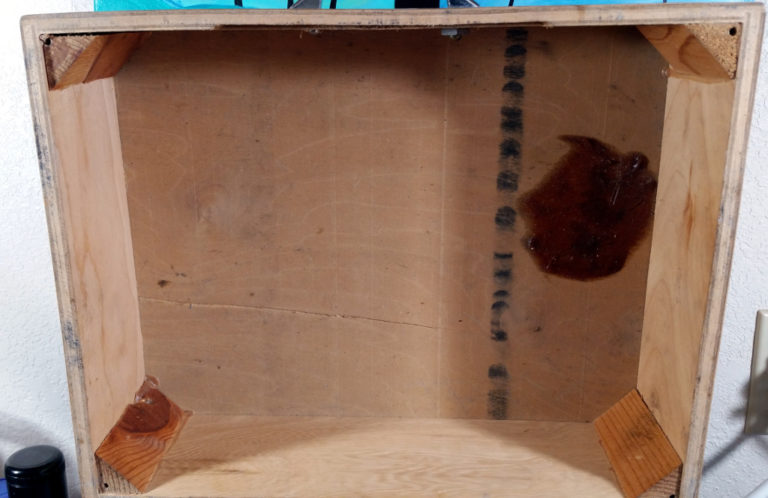
The cabinet has a large wax/oil spot on the side that would be above nothing that would cause that. The transformer is on the other side of the cabinet. I wonder if someone had the case on upside down for a period of time? But I also do not see any leakage problem with the transformer, so this is a mystery, for now.
So, the plan:
1. Add line cord and check the transformer for proper operation. If this is bad, the rest of the project would not be worth the time involved.
2. Remove all hardware possible, while keeping most of it tied together with the wiring. Hopefully, I will be able to remove the front panel for cleaning the corrosion off the back, clean up the mounting hardware and reassemble. I’m afraid I may have to unsolder all of the tube sockets to do that, though.
3. Disassemble the selector switches for cleaning
4. Reassemble components on to panel, attaching wiring.
5. Clean up all solder joints.
6. Clean potentiometers, remaining switches and rheostat.
7. Replace capacitor.
8. Test basic operation, and calibrate.
9. Potentially make mod to account for higher line voltage.
10. Add fuse to line cord.
11. Refinish cabinet.
12. Assemble into cabinet.
13. Find or make replacements for missing knobs.
Sounds like a project! Stay tuned for updates…


Comments
Post a Comment