IC-2720 Installation in 2012 Ram-1500
IC-2720 Installation in 2012 Ram-1500
I was reviewing my photos folder today, and ran across this project from 2016 that I never made a blog post on. Here is a brief overview of that installation. I’m not providing many details, as this was done several years ago, and I can’t remember many of them. Maybe it will be useful for others with this vintage of Dodge Ram pickups.
I had been using magnetic mount antennas on my 2012 Dodge Ram pickup since the time I had bought it new. I was concerned with running RF coax near any airbags that might be in the side panels of the truck. It had some badges on the side panels indicating there might be some.
After owning the truck for four years, I decided to take a chance on making my antenna connections more permanent.
I started by removing the dome light from the roof. I don’t remember now if I had to remove screws or not to do this.
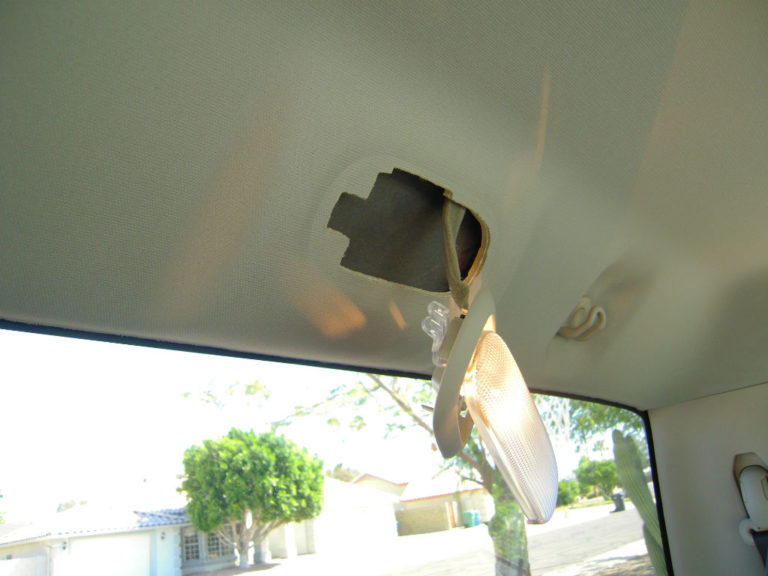
I used a Unibit to drill a 3/4″ hole in the roof fit the motorola NMO connector for the antenna.
Next, I removed the large Torx screw that held the seatbelt to the truck cab on the passenger side. That made it possible to continue removing the plastic panel on that side of the truck. The lower part of the panel was attached with clips.


The upper part of the panel was attached with a screw hidden behind the SRS badge near the top. There was no SRS Airbag installed in my truck.


With the plastic panels pulled away from the cab, I was able to run a fish tape up from the bottom of the panel to the hole that held the dome light. I attached the coax cable to the fish tape and pulled it back down, all the way to the bottom. Then I pulled the cable out to reach the mounting spot of the radio on the driver’s side behind the seat.

The coax already had the NMO connector on the end, so I continued to pull until the mount was near the hole drilled in the top of the roof.
I secured the NMO mount to the roof with the supplied locking nut with the rubber o-ring toward the truck. I then cut the other end of the coax to a length that reached the radio with appropriate routing behind the seats. Attaching a pl-259 connector to the end completed the coax work.

The steps were reversed to reinstall the plastic panels and seatbelt restraint.
The dual-band Comet SBB-5 2m/440 antenna was screwed onto the top of the NMO mount on the truck.

The Icom-2720 was attached to a wooden board placed behind the seat of the truck, which hangs off of the clothes hanger hooks near the window.

There is a Mobilinkd adapter cable from the connector on the right side, next to the microphone input. This provides audio and ptt functions for the Mobilinkd packet radio bluetooth adapter.
I use a normal cat-5 ethernet type cable to extend my microphone to the front of the cab. The original cable is not long enough to reach the front from behind the seat.
I use a 6-pin rj-11 cable to extend the control head to the front of the cab. This was run under the carpet, using my fish tape, and pulled up near the cup holder in the middle of the dash. I attached a metal L-Bracket that was nearly as long as the head to the back of the head. Then I pushed the bracket in the slot at the bottom of the filler panel under the A/C controls. It is held securely with some external RTV like glue. It has not budged in 6 more years of use, including off-roading.


Comments
Post a Comment