Heathkit TC-1 Tube Tester Restoration Part 6
Heathkit TC-1 Tube Tester Restoration Part 6
Part 6: Reassembly Con’t… Wiring Harnesses
The instructions for assembly in the TC-1 manual leave a lot to be desired. It is one long, run-on sentence/paragraph that tells you generally what to hook up in sequence. This was before Heathkit came up with its standard “check the box” format that they became famous for.
After looking at the TC-2 manual, I find that there is little difference between the TC-1 and the TC-2. Since the TC-2 has a much better manual, that is what I will generally follow while reassembling the tube checker.
After assembling the major pieces to the front panel in the previous (Part 5) post, the next step is to rebuild the two wiring harnesses. The originals have insulation crumbling, and are no longer reliable nor safe.
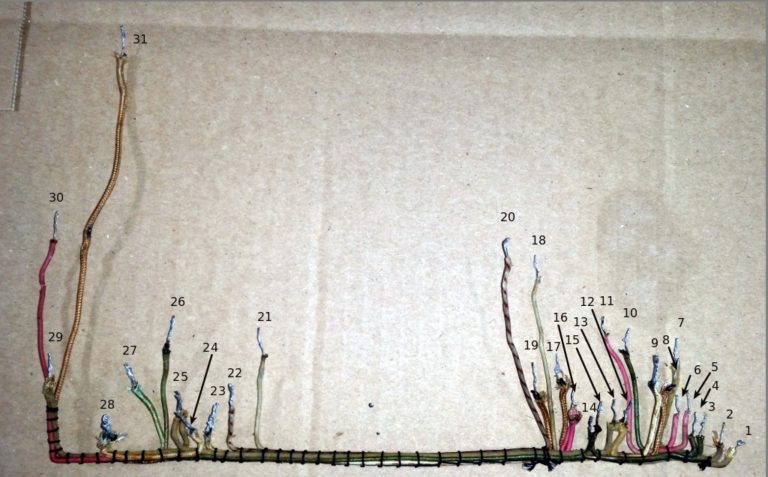
One harness is used to connect the row of wafer switches along the bottom of the tube tester with the tube sockets in the top left corner. The other harness connects the tube sockets in the top left corner with those in the top right corner (as viewed from the back).
I started off by laying out the harnesses and identifying which wires routed to which locations. I numbered each location in sequence of how far from one end they are. Then I tested each wire with my ohm meter to determine where the other end was.
After documenting this, I was able to create a chart that I could use to build a new harness.
I laid the harness on a piece of plywood to create the various spacing needed for the harness with nails. I then found some hookup wire and created a new harness, using something close to the resistor color code to match the tube number pins that each wire would eventually land on.
This would have worked just fine, but I decided that I didn’t like the very flexible stranded wire that I was using. So I made the next one with solid hookup wire instead. I didn’t have all of the exact colors, so I had to be a little creative with the color scheme, but it worked out ok. The solid wire is much better for this purpose.
Here is the result from the second harness that I created. Now I need to recreate the other harness, using the solid wire.
Stay tuned…


Comments
Post a Comment