8640b Fine Tune Repair
8640b Fine Tune Repair
Another item on the 8640b refurbishment project was the broken Fine Tune control. I could rotate the control from the front panel, but it had no effect on the frequency generated.
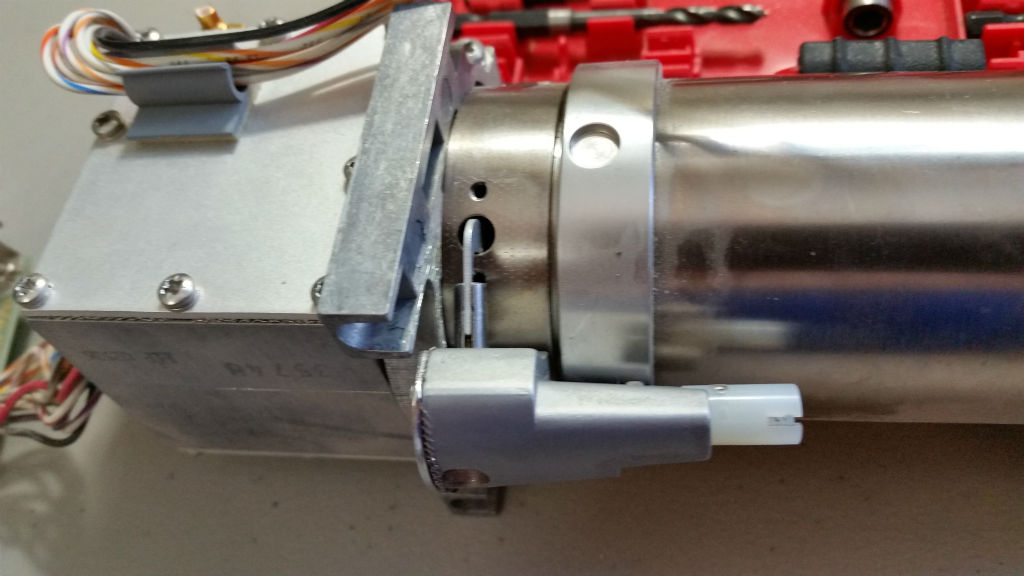
After removing the bottom cover, I could see the problem. The Oscillator Module was missing the shaft that connected the fine tube knob with the control on the rear of the main oscillator

The shaft should be near the top of the picture above.
I started the repair by removing the Main and fine tune knobs.


There is a module beside the main oscillator that needs to be removed, as it is connected to the wires from the back of the main oscillator. I just removed the two nuts/washers securing it, and pulled it up out of its card slot (it has an edge card connector). Then, it will lift out with the rest of the main oscillator module.

Next, I loosened the 4 screws securing the main oscillator to the chassis, and the two rigid coax cable connectors.

With these all loose, the module can be gently pulled back and tilted up in the rear to work around the rigid cables at the front. Then it can be lifted out of the chassis.

With the module out of the chassis, you can see that the shaft is completely missing on this generator.

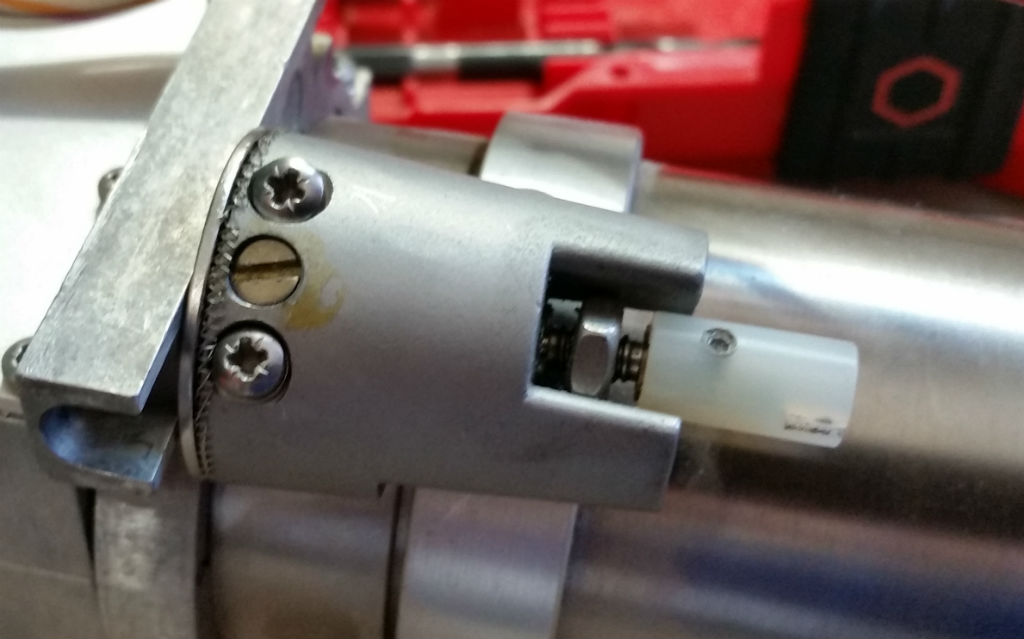
I could see why the shaft had broken and been removed. The control at the rear of the module was stuck and could not be turned by hand. To see what the problem was, I removed the two screws securing the control to the module.

With the control out, I could see that the way it worked was to move a small vane in the oscillator cavity to change the resonant frequency slightly. That vane was stuck. Note the position with the shaft nut all the way against the stop. That is the position it will need to be put in when reinstalled.
To see why the vane was stuck, I decided to remove the back cover by removing the indicated screws. Looks like someone has been in here before.

With the cover off, I could see how it worked. A small cam just rides on a rotating disk, with a spring providing a friction fit. The cam had slipped off of the disc, and become jammed.I was able to pull slightly on the vane, while rotating it, and it jumped right up where it belonged.

I then rotated the shaft through its range, while moving the vane to insure that it never ran off the end at either end of the shaft’s rotation range. With the shaft rotated halfway out from its stop, the vane points straight forward.

In order to reinstall the Vane assembly, I needed to rotate the shaft to the end of its range, so the nut was up against its stop toward the rear of the unit. This put the vane pointing to the right, as viewed from the front, which allows it to be reinserted into the cavity.
To insert the vane to the cavity, you start with the end inserted, then rotate the control up (clockwise)so that the vane goes in with no obstruction.

Note, I think I forgot to install the screen under the control at this point, and had to go back in and reinstall it. Remember the screen between the control and the cavity.
With the vane reinstalled, I was able to rotate the control shaft through its range with no problems. I returned it to the middle of its range.
Now I needed to supply the shaft. This is a little tricky, as a straight connection will not line up. There is a need for two U-Joints on the shaft to allow for the offset. I found a suitable shaft with U-Joints from an old Tektronix scope I had salvaged years ago (never throw anything away!)

I had to remove the broken old U-Joint to make room for the new one.

With the old U-Joint out of the way, there was room for the new one.

And finally, the new shaft was installed. With the new shaft, I could operate the control through its range with no binding.

Then I just reversed the removal procedure to put the main oscillator back into the chassis. Works fine now!
July 17th, 2017 at 3:47 am
Hi Mr Randy this is mulu radio amateur from Greece
I have some questions about LTspice IV simulator as regards Oscillators.
July 17th, 2017 at 6:15 am
Hello, Mulu. It has been about 5 years since I have used LT-Spice, but I will try to help…