HW-16 C-202 & C203 Rebuild
HW-16 C-202 & C203 Rebuild
After removing C-202 & C-203 from the radio. I followed the procedure in the previous post to remove the cardboard wrapper around the cans mostly intact. C-202 was the first, and I got a little rushed and tore it at the seam a little. But I was able to glue it back together when all was finished, and it turned out pretty good.
For C-203, I went slower and let the heat from the embossing tool do its job on the tar that glues the cardboard to the can. After a few minutes, the cardboard wrapper slipped off without a hitch, very cleanly. For this capacitor, I left most of the tar in the carboard tube, as it wasn’t in the way of where the new capacitor would be installed. Less work = less possibility of breaking something that isn’t broken yet!
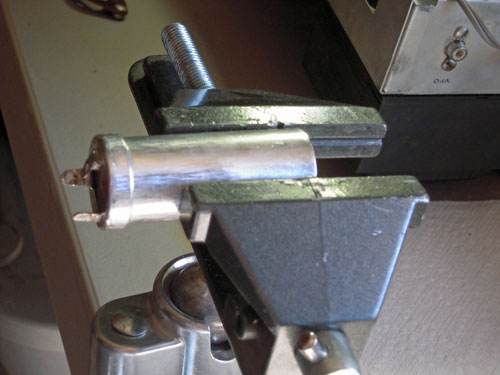
Here is one of the caps in the vice, ready to be opened up with my cheap Harbor Freight Moto-Tool.
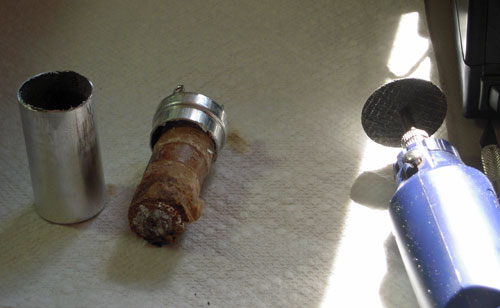
Cutting open the can was easy with the dremel tool. It didn’t need to be a super-clean or straight cut, as it was going to be put back inside the cardboard tube.
Once the can was open, I was able to just grab the insides and pull them out with the pliers.
Once that was out of the way, I needed to drill holes in the bottom fiber wafer, to allow the leads from the new cap to pass through. On the first one, C-202, I had tried pulling the cover off by grasping the capacitor lead, instead of the can lead. This resulted in a broken lead for the cap. I replaced it with a cut-down terminal lug that press fit through the existing hole. It should work ok.
Bottom of Can...
With this out of the way, I was able to install the new Electrolytic Capacitor into the can. The original ones were 50 uf at 350 volts. The new ones are 68 uf at 450 volts. I used hot-melt glue to secure it in place.
Next, the top of the can was put in place, and secured with aluminum tape I got from Home Depot.
Then, the capacitor was slipped back into the cardboard tubes, and glued in with Gorilla-Glue (Hey, It’s what I had!) They were then re-painted in black to freshen them up.
Capacitors in cardboard tubes, being repainted.
Next job was to remove the multi-section can capacitor, to be replaced by the one from Hayseed Hamfest.
With this out of the way, I used some naval jelly, mineral spirits, alcohol and brasso (not all at the same time…) to clean up the area a bit before putting the new components in.
I’ve got the chassis on the paint bench, touching up the transformer, after a cleanup with naval jelly to remove the rust on top. I primered it, and will shoot it black to freshen it up before I put the rest of the poser supply back together.
Stay tuned for more excitement next time!
Migrated Comments:


March 7th, 2013 at 9:46 pm
I now know how you make these Posts Lol