MMR40 Front Panel (Cont’)
MMR40 Front Panel (Cont’)
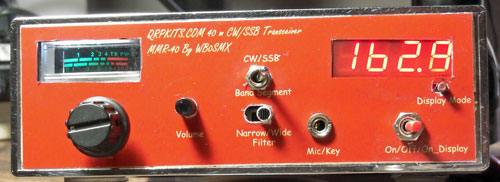
I found a piece of red acetate for the
Digital Dial Display. It was the tab on a notebook with dividers that I
picked up at Target.
After gluing this in place over the display hole, I applied glue to the
faceplate and the laminated photo cover. First, I tried Gorilla Glue,
thinking that it worked kind of like contact cement. You apply thin
layers to both objects to be joined, then let them sit for 10 minute of
so before pressing them together for a couple of hours. I let this
project sit overnight, but found that the glue just didn’t stick well to
the laminate on the back of the overlay.

Next, I tried silicone glue (the kind that smells like vinegar.) This worked better, but still did not hold all that well.

The product at this point looked kind of OK, but I thought I could do better…

The faceplates were re-designed without the black band around the holes. Then the photo was cut to size, and placed over the faceplate. Once positioned, the holes were punched directly through the faceplace and the larger openings were cut with a single-edged razor blade. I still need to find a better way to cut these rectangular holes out. I also forgot to cut out the hole for the Display mode in the upper right. That turned around to bite me later, as it resulted in a ragged cut after the glue dried.

On this attempt, I laminated on the front side of the photo. Then I applied plain old Elmer’s Glue to the panel, and pressed the paper backing of the photo onto the glue. That seemed to work much better, with a much stronger bond.

So here it sits at this point. It’s not as nice as I would like, but it looks pretty good, and works great.


Comments
Post a Comment