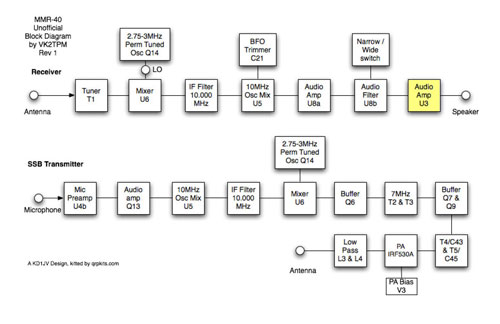
Building the MMR-40 Final Audio Amplifier U3
Building the MMR-40 Final Audio Amplifier U3
I had decided to build this transceiver step by step, rather than
just stuffing all of the components on the board, as the instructions
stated.
The next step for me was to build the audio circuits, starting with U3:
- U3 - LM386 Audio Amplifier
- V2 - Volume Control
- C54, C55, C56 – Bypass Capacitors
- C41 - Filter Capacitor
- C46, C50 - Coupling Capacitors
- R17 - load resistor
The LM-386 is configured as is typical for these types of rigs.
I was able to input an audio signal into the top of the volume control, and check the amplifier operation.
I used a program on my PC to generate a sound file that was then played
through my soundcard, using media player. The program is freeware found
at heliso.tripod.com.
I used a 20 – 3000 hz sweep signal here, but also made a two-tone
signal for later testing. The output was read with my audio tracer,
which has a level meter.
Here is the 20 to 2600 hz sweep file generated from the software signal generator.
sweep_20_2600hz
And here is a 700 hz steady tone file generated from the software signal generator.
700hz
If you turn on the Repeat function of your media player (play¦Repeat), these will output repeatedly so you can observe the effects.


Comments
Post a Comment